 S2M Center 6
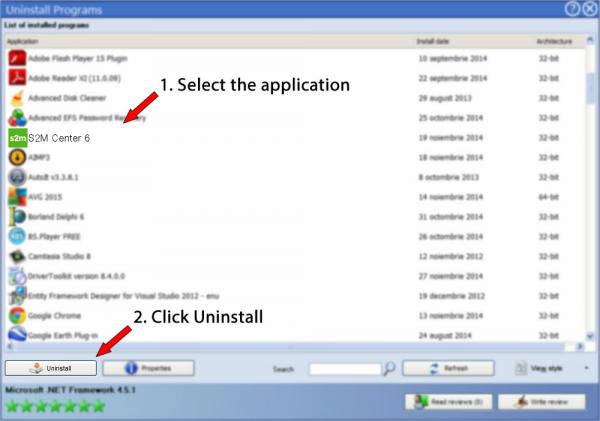
How to uninstall S2M Center 6 from your system
This page contains complete information on how to remove S2M Center 6 for Windows. The Windows release was created by Vero Software Limited. Check out here where you can get more info on Vero Software Limited. Click on http://www.screentomachine.com/ to get more information about S2M Center 6 on Vero Software Limited's website. Usually the S2M Center 6 program is installed in the C:\Program Files (x86)\InstallShield Installation Information\{345DB1AE-C164-42EB-9259-150A2E5DEC7E} directory, depending on the user's option during install. The full command line for uninstalling S2M Center 6 is "C:\Program Files (x86)\InstallShield Installation Information\{345DB1AE-C164-42EB-9259-150A2E5DEC7E}\NCCENT~1.EXE" -runfromtemp -l0x0409 -removeonly. Keep in mind that if you will type this command in Start / Run Note you might get a notification for admin rights. The program's main executable file is called NCCEN~48.EXE and its approximative size is 324.00 KB (331776 bytes).The executable files below are installed alongside S2M Center 6. They take about 648.00 KB (663552 bytes) on disk.
- NCCEN~48.EXE (324.00 KB)
This data is about S2M Center 6 version 6.00.0000 alone. You can find below a few links to other S2M Center 6 versions:
...click to view all...
When you're planning to uninstall S2M Center 6 you should check if the following data is left behind on your PC.
Folders left behind when you uninstall S2M Center 6:
- C:\Planit\NcCenter_6_0
The files below are left behind on your disk when you remove S2M Center 6:
- C:\Planit\NcCenter_6_0\Database\psnc.mdb
- C:\Planit\NcCenter_6_0\Database\PSNC-AC.MDB
- C:\Planit\NcCenter_6_0\Database\PSNC-CV.MDB
- C:\Planit\NcCenter_6_0\Database\psncLib.mdb
- C:\Planit\NcCenter_6_0\Database\PSNC-NC.MDB
- C:\Planit\NcCenter_6_0\Database\S2MVup.mdb
- C:\Planit\NcCenter_6_0\Database\UpdateDB.Run
- C:\Planit\NcCenter_6_0\dcu2d60.dll
- C:\Planit\NcCenter_6_0\dcupgm60.dll
- C:\Planit\NcCenter_6_0\Graphics\11 Spindle Andi Cab-Maxx.bmp
- C:\Planit\NcCenter_6_0\Graphics\11 Spindle Holzher.bmp
- C:\Planit\NcCenter_6_0\Graphics\11 Spindle Komo.bmp
- C:\Planit\NcCenter_6_0\Graphics\11 Spindle Shoda.bmp
- C:\Planit\NcCenter_6_0\Graphics\12 Spindle Routech Ergon - MMI.bmp
- C:\Planit\NcCenter_6_0\Graphics\13 Spindle Andi Stratos SUP.bmp
- C:\Planit\NcCenter_6_0\Graphics\13 Spindle CNT Motion Systems.bmp
- C:\Planit\NcCenter_6_0\Graphics\13 Spindle Holzher.bmp
- C:\Planit\NcCenter_6_0\Graphics\13 Spindle Northwood.bmp
- C:\Planit\NcCenter_6_0\Graphics\14 Spindle Holzher.bmp
- C:\Planit\NcCenter_6_0\Graphics\14 Spindle Routech R250.bmp
- C:\Planit\NcCenter_6_0\Graphics\14 Spindle SCM.bmp
- C:\Planit\NcCenter_6_0\Graphics\15 Spindle Andi Exxact.bmp
- C:\Planit\NcCenter_6_0\Graphics\15 Spindle Andi Stratos WFD.bmp
- C:\Planit\NcCenter_6_0\Graphics\15 Spindle Komo B.bmp
- C:\Planit\NcCenter_6_0\Graphics\15 Spindle Komo C.bmp
- C:\Planit\NcCenter_6_0\Graphics\15 Spindle Komo.bmp
- C:\Planit\NcCenter_6_0\Graphics\15 Spindle Masterwood.bmp
- C:\Planit\NcCenter_6_0\Graphics\15 Spindle Onsrud B.bmp
- C:\Planit\NcCenter_6_0\Graphics\15 Spindle Onsrud C.bmp
- C:\Planit\NcCenter_6_0\Graphics\15 Spindle Onsrud.bmp
- C:\Planit\NcCenter_6_0\Graphics\16 Spindle Anderson Cab-Maxx.bmp
- C:\Planit\NcCenter_6_0\Graphics\16 Spindle Anderson Stratos Pro.bmp
- C:\Planit\NcCenter_6_0\Graphics\16 Spindle Biesse Rover 18.bmp
- C:\Planit\NcCenter_6_0\Graphics\16 Spindle HolzHer Conquest.bmp
- C:\Planit\NcCenter_6_0\Graphics\16 Spindle HolzHer NR.bmp
- C:\Planit\NcCenter_6_0\Graphics\16 Spindle Masterwood B.bmp
- C:\Planit\NcCenter_6_0\Graphics\16 Spindle Masterwood.bmp
- C:\Planit\NcCenter_6_0\Graphics\16 Spindle MotionMaster.bmp
- C:\Planit\NcCenter_6_0\Graphics\16 Spindle MultiCAM.bmp
- C:\Planit\NcCenter_6_0\Graphics\16 Spindle Northwood.bmp
- C:\Planit\NcCenter_6_0\Graphics\16 Spindle Routech R220.bmp
- C:\Planit\NcCenter_6_0\Graphics\16 Spindle Routech R250 B.bmp
- C:\Planit\NcCenter_6_0\Graphics\16 Spindle Routech R250.bmp
- C:\Planit\NcCenter_6_0\Graphics\16 Spindle Routomat.bmp
- C:\Planit\NcCenter_6_0\Graphics\16 Spindle Rover 20.bmp
- C:\Planit\NcCenter_6_0\Graphics\17 Spindle CMS.bmp
- C:\Planit\NcCenter_6_0\Graphics\18 Spindle Komo.bmp
- C:\Planit\NcCenter_6_0\Graphics\18 Spindle Routech R130.bmp
- C:\Planit\NcCenter_6_0\Graphics\18 Spindle Routech R240.bmp
- C:\Planit\NcCenter_6_0\Graphics\18 Spindle Rover B.bmp
- C:\Planit\NcCenter_6_0\Graphics\19 Spindle Arrow TCR.bmp
- C:\Planit\NcCenter_6_0\Graphics\19 Spindle Biesse Excel.bmp
- C:\Planit\NcCenter_6_0\Graphics\19 Spindle Komo.bmp
- C:\Planit\NcCenter_6_0\Graphics\19 Spindle Northwood.bmp
- C:\Planit\NcCenter_6_0\Graphics\19 Spindle Rover 321-R.bmp
- C:\Planit\NcCenter_6_0\Graphics\19 Spindle Rye-CMS QM3015.bmp
- C:\Planit\NcCenter_6_0\Graphics\19 Spindle Rye-CMS QMS 3015.bmp
- C:\Planit\NcCenter_6_0\Graphics\20 Spindle Komo B.bmp
- C:\Planit\NcCenter_6_0\Graphics\20 Spindle Komo.bmp
- C:\Planit\NcCenter_6_0\Graphics\20 Spindle Northwood.bmp
- C:\Planit\NcCenter_6_0\Graphics\20 Spindle Rover 24 B.bmp
- C:\Planit\NcCenter_6_0\Graphics\20 Spindle Rover 24.bmp
- C:\Planit\NcCenter_6_0\Graphics\20 Spindle Rover 30 B.bmp
- C:\Planit\NcCenter_6_0\Graphics\20 Spindle Rover 30.bmp
- C:\Planit\NcCenter_6_0\Graphics\20 Spindle SCM Tech 100.bmp
- C:\Planit\NcCenter_6_0\Graphics\20 Spindle SCM Tech 99.bmp
- C:\Planit\NcCenter_6_0\Graphics\20 Spindle SCM.bmp
- C:\Planit\NcCenter_6_0\Graphics\21 Spindle Holz-Her Cosmec.bmp
- C:\Planit\NcCenter_6_0\Graphics\21 Spindle Shoda.bmp
- C:\Planit\NcCenter_6_0\Graphics\24 Spindle Alberti Gamma 90.bmp
- C:\Planit\NcCenter_6_0\Graphics\24 Spindle Morbidelli Author 500 S.bmp
- C:\Planit\NcCenter_6_0\Graphics\24 Spindle Morbidelli Author 503.bmp
- C:\Planit\NcCenter_6_0\Graphics\24 Spindle Morbidelli Author 600.bmp
- C:\Planit\NcCenter_6_0\Graphics\24 Spindle SCM Tech 100s.bmp
- C:\Planit\NcCenter_6_0\Graphics\25 Spindle Busellato.bmp
- C:\Planit\NcCenter_6_0\Graphics\26 Spindle Holzher.bmp
- C:\Planit\NcCenter_6_0\Graphics\28 Spindle Rover 27.bmp
- C:\Planit\NcCenter_6_0\Graphics\28 Spindle Rover 30.bmp
- C:\Planit\NcCenter_6_0\Graphics\34 Spindle Biesse Rover 325.bmp
- C:\Planit\NcCenter_6_0\Graphics\34 Spindle Rover 336.bmp
- C:\Planit\NcCenter_6_0\Graphics\35 Spindle Buesellato.bmp
- C:\Planit\NcCenter_6_0\Graphics\41 Spindle Komo.bmp
- C:\Planit\NcCenter_6_0\Graphics\41 Spindle Morbidelli Author 504.bmp
- C:\Planit\NcCenter_6_0\Graphics\43 Spindle Biesse Rover.bmp
- C:\Planit\NcCenter_6_0\Graphics\9 Spindle CMS.bmp
- C:\Planit\NcCenter_6_0\Graphics\9 Spindle Komo 5x5.bmp
- C:\Planit\NcCenter_6_0\Graphics\9 Spindle Komo 7x3.bmp
- C:\Planit\NcCenter_6_0\Graphics\9 Spindle KOMO VR1605TT (A).bmp
- C:\Planit\NcCenter_6_0\Graphics\9 Spindle KOMO VR1605TT (B).bmp
- C:\Planit\NcCenter_6_0\Graphics\9 Spindle MultiCAM B.bmp
- C:\Planit\NcCenter_6_0\Graphics\9 Spindle MultiCAM.bmp
- C:\Planit\NcCenter_6_0\Graphics\9 Spindle Omnitech Selexx B.bmp
- C:\Planit\NcCenter_6_0\Graphics\9 Spindle Omnitech Selexx.bmp
- C:\Planit\NcCenter_6_0\Graphics\9 Spindle Onsrud.bmp
- C:\Planit\NcCenter_6_0\Graphics\9 Spindle Routech R120.bmp
- C:\Planit\NcCenter_6_0\Graphics\9 Spindle Routech R130.bmp
- C:\Planit\NcCenter_6_0\Graphics\9 Spindle Routech R220.bmp
- C:\Planit\NcCenter_6_0\Graphics\9 Spindle Routech R240.bmp
- C:\Planit\NcCenter_6_0\Graphics\9 Spindle Routech R250.bmp
- C:\Planit\NcCenter_6_0\Graphics\9 Spindle Routomat.bmp
Registry that is not uninstalled:
- HKEY_LOCAL_MACHINE\SOFTWARE\Classes\Installer\Products\EA1BD543461CBE24299551A0E2D5CEE7
- HKEY_LOCAL_MACHINE\Software\Microsoft\Windows\CurrentVersion\Uninstall\InstallShield_{345DB1AE-C164-42EB-9259-150A2E5DEC7E}
Open regedit.exe in order to delete the following registry values:
- HKEY_LOCAL_MACHINE\SOFTWARE\Classes\Installer\Products\EA1BD543461CBE24299551A0E2D5CEE7\ProductName
How to uninstall S2M Center 6 with Advanced Uninstaller PRO
S2M Center 6 is an application offered by the software company Vero Software Limited. Sometimes, people choose to remove this program. Sometimes this can be efortful because doing this manually takes some know-how regarding removing Windows programs manually. One of the best EASY manner to remove S2M Center 6 is to use Advanced Uninstaller PRO. Here are some detailed instructions about how to do this:1. If you don't have Advanced Uninstaller PRO on your Windows system, install it. This is a good step because Advanced Uninstaller PRO is a very efficient uninstaller and general utility to optimize your Windows PC.
DOWNLOAD NOW
- go to Download Link
- download the program by clicking on the DOWNLOAD button
- set up Advanced Uninstaller PRO
3. Click on the General Tools button

4. Press the Uninstall Programs tool

5. All the applications existing on your computer will appear
6. Navigate the list of applications until you find S2M Center 6 or simply click the Search feature and type in "S2M Center 6". The S2M Center 6 app will be found very quickly. Notice that when you click S2M Center 6 in the list , some data about the application is made available to you:
- Safety rating (in the lower left corner). This tells you the opinion other people have about S2M Center 6, from "Highly recommended" to "Very dangerous".
- Opinions by other people - Click on the Read reviews button.
- Details about the application you wish to uninstall, by clicking on the Properties button.
- The web site of the program is: http://www.screentomachine.com/
- The uninstall string is: "C:\Program Files (x86)\InstallShield Installation Information\{345DB1AE-C164-42EB-9259-150A2E5DEC7E}\NCCENT~1.EXE" -runfromtemp -l0x0409 -removeonly
8. After uninstalling S2M Center 6, Advanced Uninstaller PRO will offer to run a cleanup. Press Next to go ahead with the cleanup. All the items that belong S2M Center 6 which have been left behind will be detected and you will be able to delete them. By removing S2M Center 6 using Advanced Uninstaller PRO, you can be sure that no registry entries, files or directories are left behind on your disk.
Your system will remain clean, speedy and able to take on new tasks.
Geographical user distribution

Disclaimer
The text above is not a recommendation to remove S2M Center 6 by Vero Software Limited from your computer, nor are we saying that S2M Center 6 by Vero Software Limited is not a good application. This text simply contains detailed instructions on how to remove S2M Center 6 supposing you decide this is what you want to do. Here you can find registry and disk entries that our application Advanced Uninstaller PRO discovered and classified as "leftovers" on other users' PCs.
2016-01-15 / Written by Daniel Statescu for Advanced Uninstaller PRO
follow @DanielStatescuLast update on: 2016-01-15 14:15:12.937